OOF2: The Manual
| 3.5. Active Area | ||
|---|---|---|

|
Chapter 3. Task Pages |  |
Active
Areas provide a way of restricting OOF2 operations to a
subset of a Microstructure. They are manipulated by the commands in
the OOF.ActiveArea menu. See that section for a more
detailed discussion.
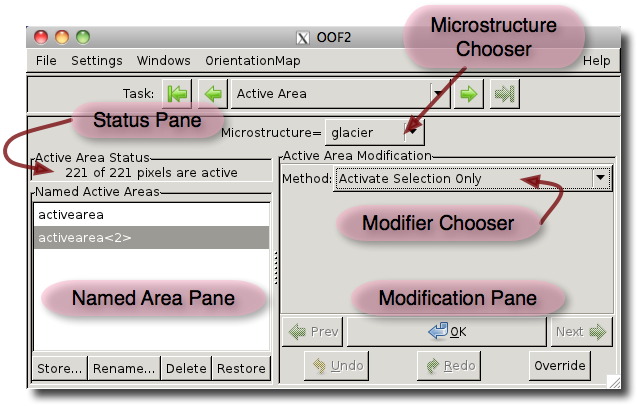
The Active Area Page, as shown in Figure 3.6, contains a Microstructure
Chooser, a Status Pane, a Named Area Pane,
and a Modification
Pane. Active Areas are specific to a particular Microstructure.
The Chooser selects which Microstructure's Active Area is being
addressed by the rest of the page. The Status Pane simply
states how many pixels are currently active in the current
Microstructure.
The Named Area Pane contains the machinery needed to give names to Active Areas and store them for later use. The bulk of the pane is a list of named areas. Clicking on a name in the list selects it. Double-clicking on a name is equivalent to single-clicking and using the button. The buttons at the bottom of the pane operate on the selected Active Area:
-
The button stores the current ActiveArea (the currently active pixels in the current
Microstructure) and assigns a name to it. The newly named area will be selected in the Named Area list. -
The button renames the Active Area that's currently selected in the list.
-
The button deletes the currently selected Active Area from the list.
-
The button activates the selected Active Area. That is, the named stored Active Area becomes the
Microstructure's current Active Area. Clicking on the button is equivalent to double-clicking a name in the list.
The Active Area Modification pane is similar to the
Modification Panes in the Image and Pixel Selection
pages. At the top is a pull-down menu of methods of modifying
the Active Area of the current Microstructure. The modifiers in this
menu correspond to commands in the OOF.ActiveArea menu. Modifiers that
require additional arguments display them in the region below
the menu. Below this are a set of buttons:
-
The performs the action specified by the currently selected modifier.
-
The and buttons undo and redo the most recent changes to the Active Area.
-
The and buttons cycle the Modifier Chooser through the most recently used modifiers. These buttons have no direct effect on the current Active Area.
-
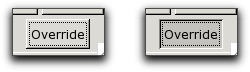
The button makes the whole
Microstructureactive as long as the button is pressed. Unlike the other buttons on the page, when the button is pressed, it stays pressed. It must be pressed again to release it. Figure 3.7 shows the two states of the button, unpressed (on the left) and pressed (on the right).
|
|
 |
|
| 3.4. Pixel Selection |  |
3.6. Materials |