OOF2: The Manual
| 1.2. Running OOF2 | ||
|---|---|---|

|
Chapter 1. Getting Started |  |
At this point, you should have an executable file named
“oof2” in a bin directory in your execution path.
You can now simply type oof2 at your
shell prompt, and OOF2 will start up.
[2]
OOF2 has many command line options, shown in Table 1.2. Options may be typed after
oof2 when starting the program. The
options may be abbreviated, as long as the abbreviation is
unique. The double dashes before each option are required. An
equals sign between options and their arguments is optional.
Table 1.2. OOF2 Command Line Options
| Option | Argument | Description |
|---|---|---|
| Options for loading files and commands. | ||
|
|
filename |
|
|
|
filename |
Load an |
|
|
filename |
|
|
|
module name |
Load a Python extension module.[a] |
|
|
The name of a directory |
Add a directory to the Python search path, so that OOF2 can import modules from it.[a] |
|
|
Automatically load all
OOF2 extension
moduless found in
the |
|
|
|
text |
Evaluate the given OOF2 Python command. Any valid Python expression can be given. It must be in quotation marks if it contains spaces.[a] |
| Options controlling the user interface | ||
|
Turn off graphics mode. |
|
|
|
width x height |
Specify the initial size, in pixels, of the main OOF2 window. |
|
|
gtk options |
Extra options for graphics mode, passed to the gtk+ library. |
|
|
Quit quietly when done, without confirmation. |
|
|
|
Quit immediately after running scripts (implies
|
|
| Miscellaneous options. | ||
|
|
Display valid options, then quit. |
|
|
|
Display version number, then quit. |
|
|
integer |
Seed for the random number generator. |
| Debugging options, which you probably won't need. | ||
|
|
Turn on debugging mode (increased verbosity, and seed=17). |
|
|
|
Don't use multiple execution threads.[c] |
|
|
|
file name |
Record all user interaction with the GUI in the given log file. Used for generating the GUI tests. |
|
|
file name |
Replay the GUI session stored in the given log file,
which must have been recorded with
|
|
|
integer |
Approximate time delay in milliseconds to insert between lines when replaying a recorded GUI log file. |
|
|
Ignore synchronizing checkpoints when replaying a GUI log file. Not recommended. |
|
|
|
Don't use the real file selector widget, which causes problems when replaying GUI logs.[d] |
|
|
|
Use the real file selector widget, even though it causes problems when replaying GUI logs.[d] |
|
|
|
Don't show progress bars when in text mode. |
|
|
[a] This option may be present more than once. Files will be loaded in the order in which they are listed. [c]
Threading allows multiple tasks to be performed
simultaneously. Using
[d]
If neither |
||
OOF2 has two modes of operation: the normal graphics mode,
driven by a graphical user interface (GUI); and a text mode,
invoked by starting the program with the --text
option. OOF2 can be conceptually split into two parts: a
computational back end and the GUI front end. The difference
between the text and GUI modes of operation is that in GUI
mode the front end transmits commands to the back end, and in
text mode the user types those same commands, or has the
program read them from a file.
OOF2 commands are expressions in the Python programming
language. They are arranged in hierachical menus. The root
of the hierarchy is the python object
OOF. Commands all have the form
OOF.Menu.SubMenu.Command(argument=value, ...)
There may be multiple levels of submenus, or none at all, and there may be any (non-negative) number of arguments. The format of each command is described in detail in Chapter 6. In general, however, you won't want to run OOF2 in text mode. The commands can be quite long, and typing them yourself might be tedious. Instead, use the GUI to save a script, edit the script if necessary, and reload it in GUI or batch mode.
All actions in OOF2 are expressed in terms of menu
commands, which are enumerated explicitly in The Main OOF Menu. If you want to run a set of
commands automatically each time OOF2 starts, you can place
them in a file called .oof2rc in your
home directory. Good commands to put in this file are those
that control graphics
window defaults, or the GUI theme and fonts.
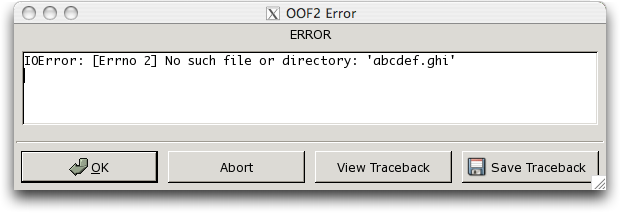
If something goes wrong while you're running OOF2, you'll be told about it and given the choice of continuing, or aborting the program. In GUI mode, a dialog box like the one shown in Figure 1.1 will appear. If the error is yours (e.g, a data file is missing, or you specified incompatible boundary conditions) then it's safe to click and continue. If the problem is ours, and is due to a bug in OOF2, you may want to click to quit the program. Please file a bug report!
If you abort OOF2 from the error dialog, or if something
goes seriously wrong and it aborts itself, a log file will be
saved automatically. The location of this file is operating
system dependent, but it will always be in the default
directory for temporary files on your system.
/tmp is a good place to start
looking. The file will be named
oof2-XXXXX.py or
XXXXX-oof2.py, where
XXXXX is a random string of characters
that guarantees that the filename is unique. If you report a
bug, please include the log file.
[2]
Users of older Macintosh OS X systems may have to start
X11 before starting OOF2. Then
OOF2 can be started in an xterm
window, or in a Terminal window
if the DISPLAY environment variable has
been set correctly, probably to :0.0.
|
|
 |
|
| Chapter 1. Getting Started |  |
1.3. Learning OOF2 |